So far, I think we have worked reasonably well as a group, although there is room for improvement in our group communication and the way we discuss our ideas. We have managed to build our skills up in the organisation, planning and technical sections of the project. However there are some fundamental problems with our opening sequence that need to be resolved before the main shoot and edit weeks.
Before the main shoot we need to go back to our storyboard and re think some of our shots and the plot of the opening sequence. We also need to find a new location for our main shoot.

Front and Back Digipack
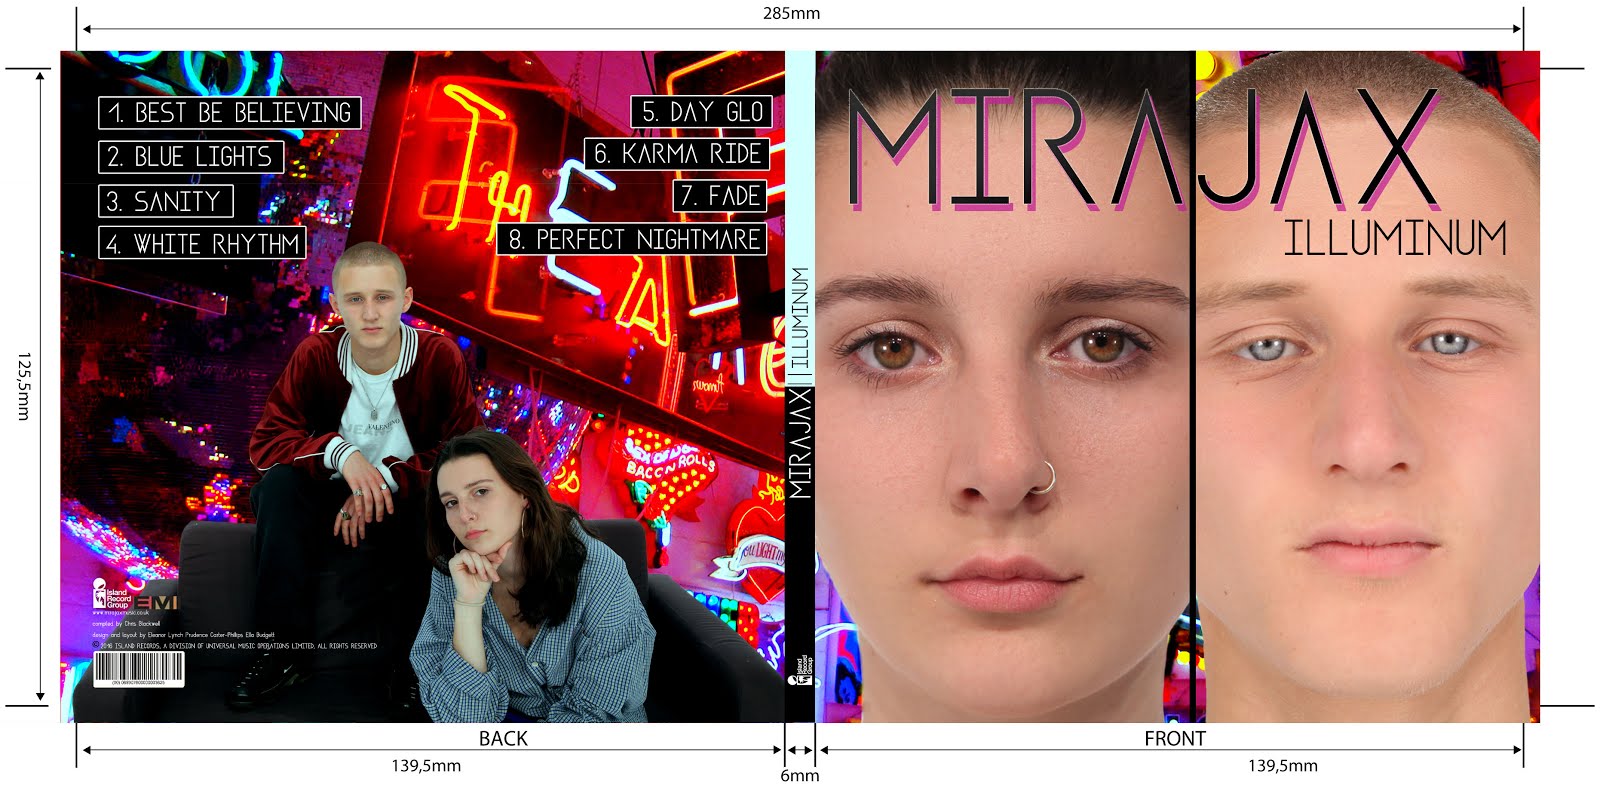
Front and Back Digipack
Inside Digipack
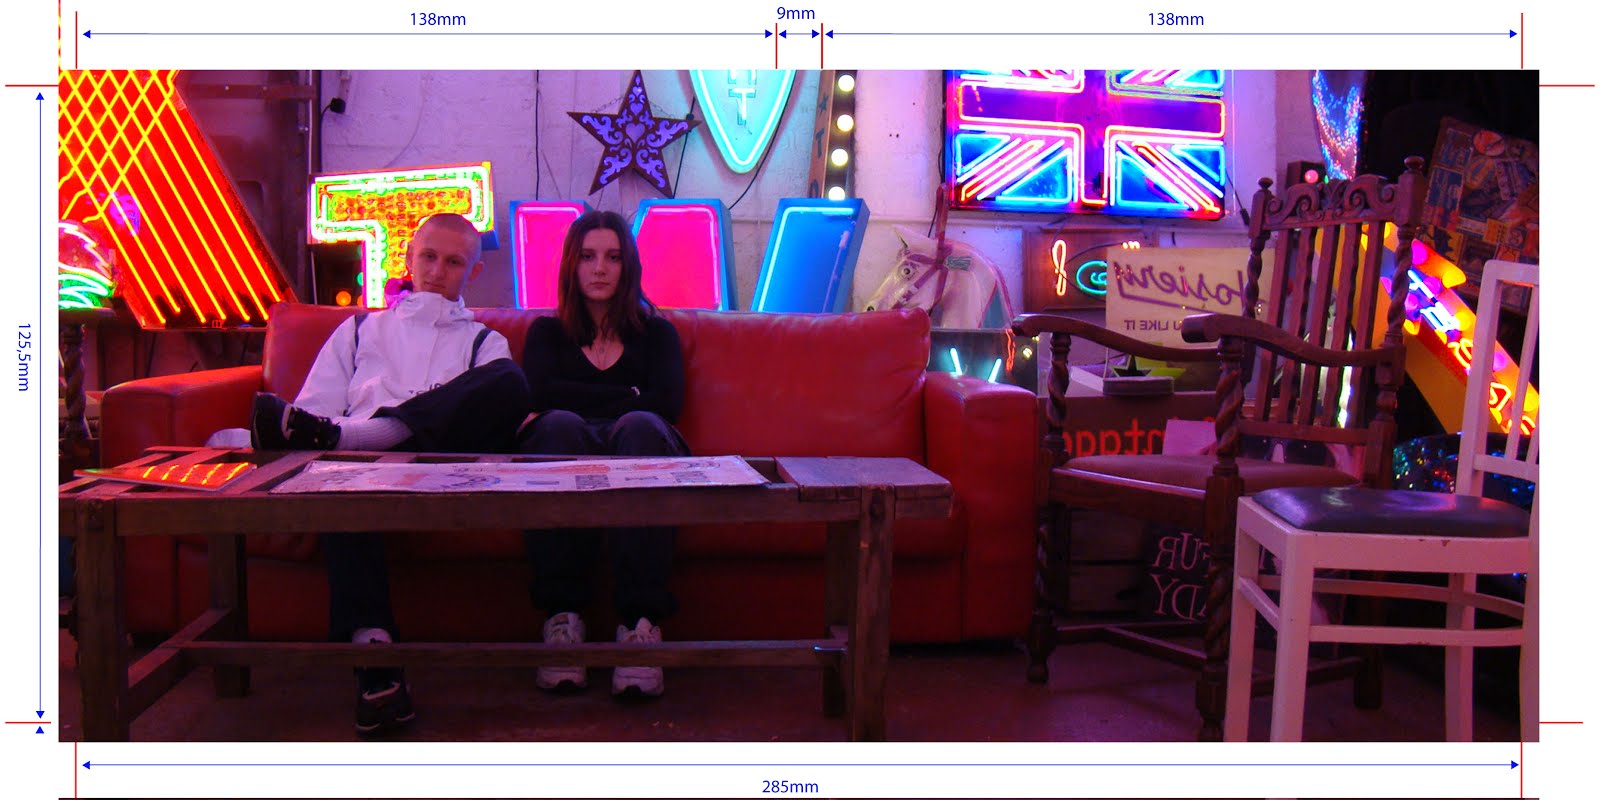
Inside Digipack

Please click this image to enter our website
Thursday 4 February 2016
R+P Post 19: Our Rough Cut
The rough cut helped us to identify some key flaws within the plot of our opening sequence. This meant we went back to our storyboard and made some drastic changes to the shots that we planned to take in our main shoots. The rough cut was helpful in this sense as it improved our plot for the opening sequence.
R+P Post 18: Our Test Shoot
Our test shoot was unfortunately not as successful as we had hoped it would be. We encountered several problems throughout the shoot and although this mean our shoot did not go as planned, it was an important learning curve for us as a group.
Here is a list of the problems we encountered:
Here is a list of the problems we encountered:
- We did not have all the props that we had planned to use or our chosen actress. We had planned to utilise the test shoot as a chance to test our camera skills and the shots we had planned and to find out if our basic plot would be clear. Therefore we didn't gather all our props or request the help from our actor which affected the quality of our rough cut.
- Our Location. Our location turned out to not be suitable for the filming of our sequence as it was far too small, this made moving around and using the tripod extremely difficult and affected the quality of our shots.
 |
| Our filming location for the test shoot |
- Travel Issues- Due to traffic problems, two members of the group arrived to the shoot significantly later than we had planned. This meant our schedule was set back by a few hours and this affected the lighting later on in the shoot. As we ran out of natural daylight we were forced to turn on the lights which affected our continuity.
The test shoot was very important in the process of our full project, as we did not only learn how to organise a shoot well which helped us in our main shoots, but we also made a lot of changes to the plot of our opening sequence following the test shoot.
R+P Post 17: Our Planned Costumes and Props, Hair and Make-up
We created a costume list for each character with pictures and references to help us visualize the characters and how they would look. This list also helped us to plan what costumes we would need to bring to our shoot:

For references when planning our costumes, hair and makeup we looked at films/tv series which also had British teenage characters. Our main focus was the Inbetweeners, particularly characters Carley and Simon who wear basic clothes which convey the fact that they are normal British teenagers, which is what we wanted for Grace and her brother:
For Ellas character we referenced the character Katie from skins as she is meant to be a cool, popular character which is what we wanted Ella to appear as. We took inspiration from her large hoop earrings and girly outfits normally including skirts.


Our costume list also included descriptions of hair and makeup and we used this as a reference when getting our actors ready on the shoot.
For references when planning our costumes, hair and makeup we looked at films/tv series which also had British teenage characters. Our main focus was the Inbetweeners, particularly characters Carley and Simon who wear basic clothes which convey the fact that they are normal British teenagers, which is what we wanted for Grace and her brother:
 |
| Carley and Simon from the Inbetweeners. |
For Ellas character we referenced the character Katie from skins as she is meant to be a cool, popular character which is what we wanted Ella to appear as. We took inspiration from her large hoop earrings and girly outfits normally including skirts.

R+P Post 16: Casting
We created a cast list for our actors:
 We included in our cast list what character they were playing, the characters background, a head shot of the actor and their basic information.
We chose Celine as our main actress as we knew she was a capable and experienced actress, this would mean that filming would be a lot easier and the quality of our production would be overall better.
We chose to use Josh and Ella for the two remaining roles as they are extremely small roles which do not require experienced actors, and so by using two members of the group this would make the shoot more reliable as we would not have to bring in two other actors.
R+P Post 15: Our Planned Filming Location and Set Design
The filming location we chose was a bedroom in Gabriel's house:


We chose this room as it was a good size and quite plainly decorated which made it easy to dress.
Using Gabriels house as our filming location was good as it was of a good size for our projects and made filming a lot easier than in the location we used for our test shoot.


We chose this room as it was a good size and quite plainly decorated which made it easy to dress.
Using Gabriels house as our filming location was good as it was of a good size for our projects and made filming a lot easier than in the location we used for our test shoot.
R+P Post 14: Our Call Sheet
We created a detailed call sheet before our main shoot sessions and gave a copy to each member of our group and our actor. This allowed the shoot to run much smoother as everyone knew where they were meant to be at all times and it also meant if there were any issues everyone was contactable at all times.
On our call sheet we included:

On our call sheet we included:
- Location address
- Contact numbers for everyone involved in the shoot
- Health and safety details
- A timed schedule for the crew outlining where everyone should be and what they should be doing at all times
- A timed schedule for the actress so she knew where she should be at all times

R+P Post 13: Our Shoot-Board
We created a shoot board which enabled us to put our shots into an order that would make shooting as efficient as possible, for example doing all the shots in one location at one time. The shoot board made the shoot easier as we could quickly identify the dialogue, acting and framing required in each shot. We also left space to note down the number of takes we took for each shot and which take was the best one to speed up the editing process.


R+P Post 12: Our Animatic
The next stage in our planning stage was to create an anamatic using the shots we planned in our storyboard.
Animatic: An animatic is a series of still images edited together and displayed in sequence with a rough dialogue and soundtrack added.
We create our animatic to allow us to test our shots even further and discover if they work to meet the two minute time slot and also made any continuity errors easily identifiable. It also allowed us to test our sound track to see whether it would suit our opening sequence. After creating the animatic we corrected some continuity errors by adding in some more shots.
R+P Post 11: Our Timeline and Storyboard
The first stage that we carried out when going to plan our opening sequence was to create a timeline in order to plan out the order of events that were going to take place and roughly how long each action would take. We did this by putting together three sheets of A3 paper and split it into three sections:
- video track
- audio track
- dialogue
In the video track we planned what the audience would see at each point in the sequence, in the audio track we planned when music would be included and any sound effects we would use, and in the dialogue track we wrote in when any dialogue would occur in the sequence.
This process allowed us to test our ideas within the two minute time frame and to plan exactly what action we wanted to happen in our sequence.
After creating our timeline we went on to create our storyboard where we would plan out each individual shot. To do this we used a piece of sugar paper and drew our shots onto post it notes so that we could easily rearrange them if we needed to. We used different coloured post-it notes for different shot types:

After creating our timeline we went on to create our storyboard where we would plan out each individual shot. To do this we used a piece of sugar paper and drew our shots onto post it notes so that we could easily rearrange them if we needed to. We used different coloured post-it notes for different shot types:
- Green- Close up
- Orange- Mid shot
- Yellow- Long shot
- Pink- Titles

This process was very useful for us as it allowed us to think about continuity techniques which meant we added several shots after our first storyboard to achieve continuity.
Wednesday 3 February 2016
R+P Post 10: Reflections so far/ looking ahead
Overall, so far we have worked well as a group and despite having a few disagreements which we managed to resolve quickly and maturely. We managed to all contribute equally while planning our opening sequence and have come up with an idea which is both original and achievable within our constraints.
The test shoot will be the perfect opportunity to test our ideas and see if all of our plans will work out in practice. It will be a good opportunity to finalise all of our shots and discover weather our storyboard will work for the real opening sequence.
The test shoot will be the perfect opportunity to test our ideas and see if all of our plans will work out in practice. It will be a good opportunity to finalise all of our shots and discover weather our storyboard will work for the real opening sequence.
R+P Post 9: Our script
When writing the script for our opening sequence we wanted to keep the eerie atmosphere that we created through our shots, and therefore we kept the dialogue to a minimum. We also chose to limit the dialogue to make the audience focus more on Grace's character and get to know her quicker.

Subscribe to:
Posts (Atom)